
Flower Farm Irrigation 4 Mistakes & 2 Minute Test
Flower Farm Irrigation: Don't Limit Your Water System and 4 Mistakes I Made But You Won’t
If you’re setting up a garden to sell cut flowers, here are four things I wish I’d known first when it comes to drip irrigation.
1. Bring as Much Water to the Field as Possible
The biggest mistake I made was under sizing the main line. When I first started out and received help, I was treated like a small home gardener, and the system was too light. The mainline was ½”. I don’t want to manage a pile of zones; I want to water as much as I can at one time.
Bottom line: Don’t run a tiny main line to your field. (Unless you have to because you don’t have enough pressure) Use the biggest practical size for your water pressure and GPH. setup so you’re not stuck with endless zones. A half-inch main line cuts your capacity too much; I’d go bigger so you can water more at once.
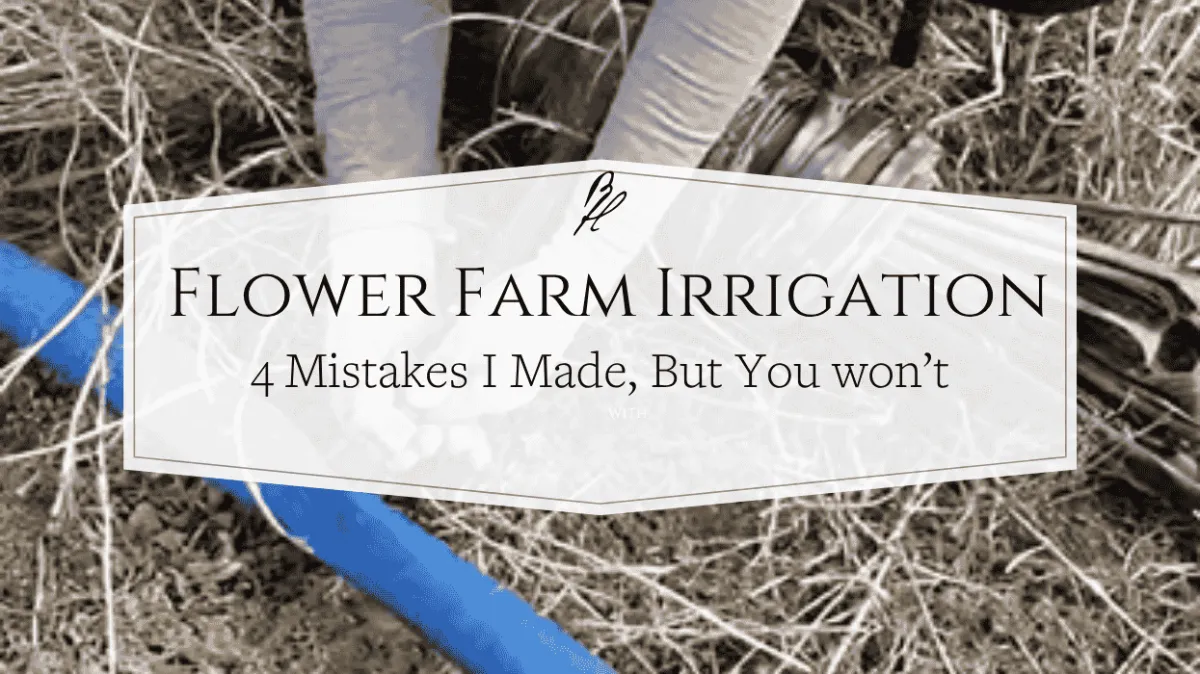
The blue mainline you see in the picture below is 1 1/2" flatlay... This particular field has a beefed up water source that is commercial. My other fields are on a regular municipal water system and has 12+gpm and I run 1" mainline on them. You can also do 3/4"... just do the biggest you can.

2. Measure Your Water First (Before Any Planning)
Don’t start at the computer, start at your water spigot. You need to know how much water you actually have before you build anything.
Two-minute bucket test:
Fill a 5-gallon bucket (s) from your spigot for one minute. See how many gallons you collected in that minute.
That number is your GPM (gallons per minute).
Multiply by 60 to get GPH (gallons per hour).
These two numbers tell you how much drip you can run at once before you have to create another zone. From there, plug them into calculators to figure out your zones and drip needs. (I’ve provided a link at the end of this.)
For instance, in this photo, I am running 1 line of drip per row that are 40 ft. each. Based on my water availability (gph), I can run that whole side (22 rows) as one zone using low-flow drip tape... meaning only one valve to turn on and all of it gets watered at the same time.

3. Low-Flow vs. High-Flow: Pick What Matches Your Scale
As my operation grew, I ended up with too many zones using higher-flow drip. Switching to a low-flow drip line let me water a larger area at one time with the water I had available.
Also, when I stretched to 200-foot (or longer) rows, the higher-flow tape wasn’t efficient anymore. You can’t really use it for rows that long. Low-flow solved that and simplified my setup.
Bottom line: If you’re getting “too many zones,” low-flow can let you do more beds at once… though you will need to water a bit longer.
4. Drip Doesn’t Like Going Uphill
I had a field that climbed a bit, and the drip just did not cooperate. I changed the layout so the drip wasn’t feeding uphill—running crosswise instead—and the problem went away.
Bottom line: Avoid sending drip uphill. If there’s a slope, change your orientation so you’re not fighting it.
Your Next Step (Do This Today)
Grab a bucket, measure the water at your spigot, and write down your GPM and then your GPH. With those numbers, the calculators make the rest simple, and you can start planning how many zones, how much tape you need, and how to lay it out. You can absolutely do this… make yourself a lovely cup of coffee and enjoy the process.